Product photography is an essential skill for any business, and having the right lighting techniques can make all the difference in your final images. Whether you're a professional photographer or an amateur, having an understanding of the different lighting techniques available to you can help you to create stunning photographs that stand out from the crowd. From using natural light to setting up a studio environment, this article will provide you with the tips and tricks you need to get the perfect shot every time. Learn about the different types of lighting and how to use them to capture amazing product photos.
Types of Lighting for Product Photography
Lighting is one of the most important elements in product photography, and can make or break a shot.There are several types of lighting used in product photography, each with its own advantages and disadvantages. In this section, we'll cover the different types of lighting used in product photography and explain when they are best used.
Natural Light
- Natural light is often the preferred option for product photography as it provides a softer, more natural-looking light. Natural light can be used to create beautiful and subtle shadows, which can add depth and dimension to the product.Natural light is also more affordable than studio lighting, making it an attractive option for product photographers on a budget.
Studio Lighting
- Studio lighting is the most popular type of lighting used in product photography. It allows for precise control over the lighting, allowing you to achieve the exact look and feel you want for your product photos. Studio lighting is typically more expensive than natural light, but it can be a great option if you want to achieve a specific look or if you need to shoot in a controlled environment.Flash - Flash is a great way to add drama and contrast to your product photos. It can be used to create dramatic shadows and highlights, and can be used to create a high-contrast look that can make your products stand out from the background. Flash can be a bit more expensive than natural light and studio lighting, but it's worth considering if you want to add some extra drama to your product photos.
Adjusting Your Settings For Best Results
When it comes to product photography, adjusting your camera settings is key to capturing the best images. In this section, we'll discuss how to adjust the settings on your camera for the best results with product photography.We'll cover topics such as shutter speed, ISO, white balance, and more. Shutter speed is an important setting for product photography. A slower shutter speed will allow more light in and create a softer image. A faster shutter speed will create a sharper image with less motion blur. It's important to choose the right shutter speed to capture the best image. ISO is another important setting for product photography.
It determines the sensitivity of the camera sensor to light. A higher ISO will result in a brighter image, while a lower ISO will result in a darker image. It's important to experiment with different ISO settings to find the right balance. White balance is also an important setting for product photography. It determines how colors are rendered in your images.
Different light sources have different color temperatures and it's important to adjust the white balance accordingly. Experimenting with different white balance settings can help you get the most accurate colors in your images. Finally, it's important to consider the aperture when shooting product photography. The aperture determines how much light is let into the camera, as well as how much of the image is in focus. A larger aperture will let in more light and create a shallow depth of field, while a smaller aperture will let in less light and create a deeper depth of field.
Experimenting with different aperture settings can help you achieve the desired look for your images.
Post-Processing For Enhancing Your Shots
Post-processing is a key part of product photography. It allows you to make adjustments to your images in order to enhance the colors, contrast, and other elements. This section will explain how to use post-processing techniques to enhance your product photos. We'll talk about things like retouching, color correction, and more. Retouching is a great way to refine your product photos.It can be used to remove any imperfections in the image or to give it a more polished look. Retouching can also be used to add contrast and clarity to the image, making the colors pop and making the product look more appealing. Color correction is another important post-processing technique. It can be used to adjust the colors in the image to make sure they are accurate and true-to-life. Color correction can also be used to adjust the white balance of the image, so that colors appear natural and consistent. Another important post-processing technique is sharpening.
This is used to make the edges of objects in the image stand out more, giving them a sharper and more detailed look. Sharpening can also be used to reduce noise in the image, making it look cleaner and more professional. Finally, post-processing can also be used to add effects to your product photos. This can include things like vignetting, blurring, and other special effects that can give your images a unique look and feel.
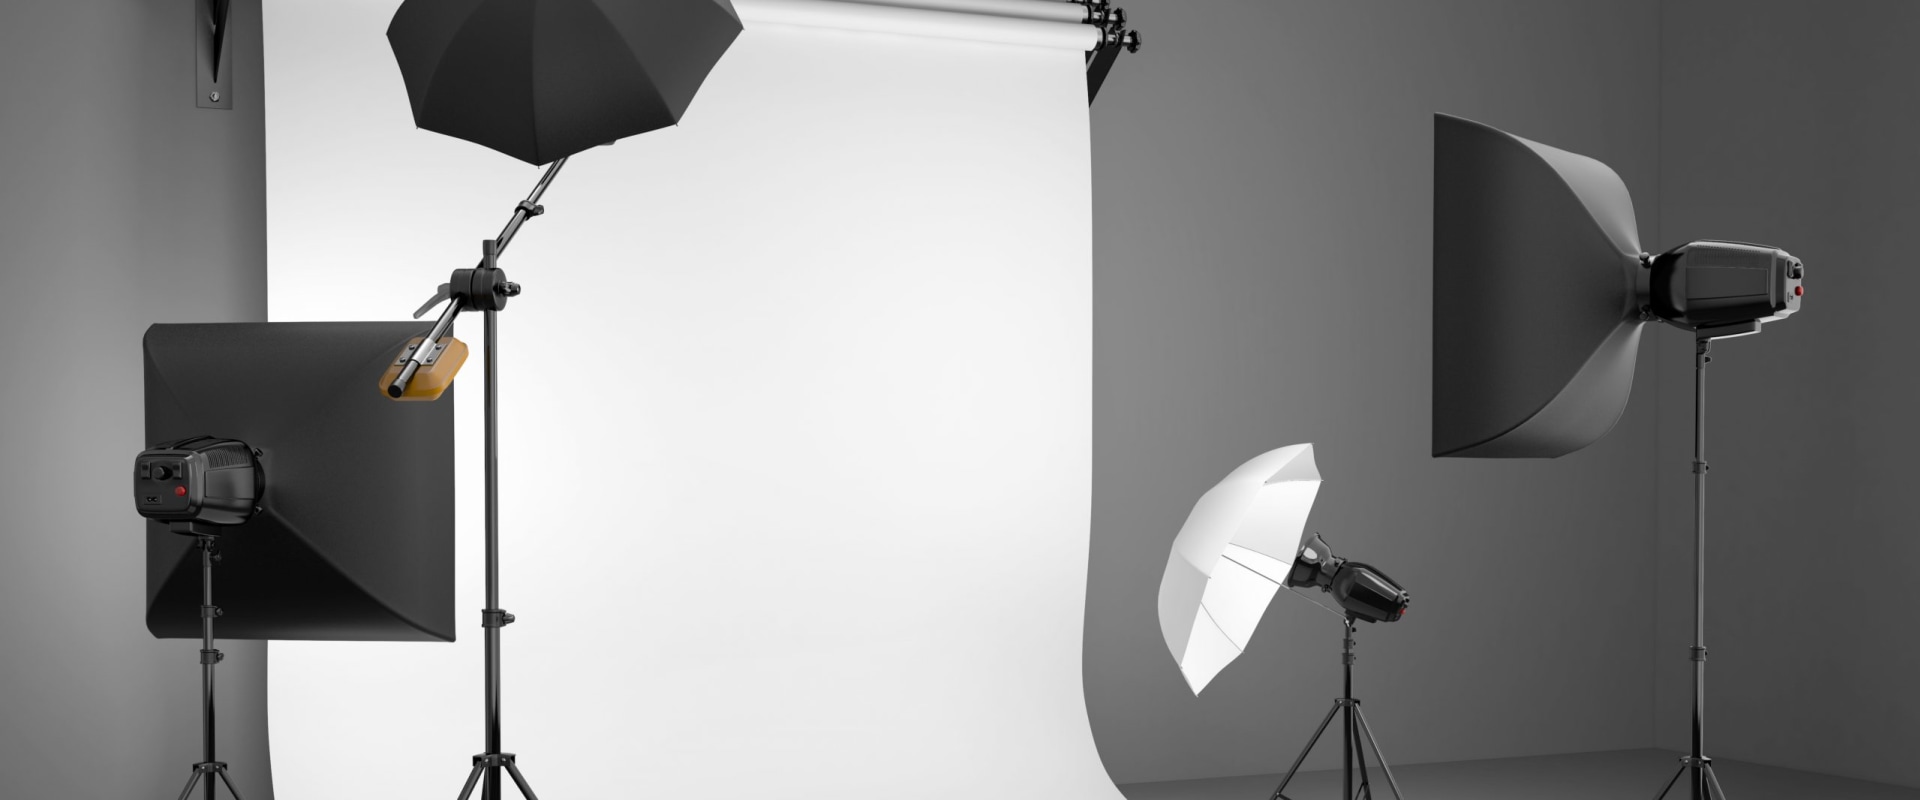
Setting Up Your Lighting Setup
Lighting Setup for Product PhotographyLighting is essential for successful product photography and having the right setup can make all the difference. In this section, we'll cover how to set up your lighting setup for product photography.This includes positioning your lights, choosing the right accessories, and setting the right settings on your camera. When positioning your lights, you'll want to consider how much light you need and where it will be coming from. Natural light is the best option for product photography because it's free and provides even lighting. If you're using a flash or strobe, make sure you position it at a 45-degree angle to your subject to avoid harsh shadows. When selecting your lighting accessories, it's important to choose the ones that will work best for your particular setup. Some popular options include softboxes, umbrellas, and reflectors.
Softboxes provide a soft and even light, while umbrellas and reflectors can be used to create interesting effects. You can also experiment with different colors of gels to add some extra drama to your shots. Finally, you'll need to adjust the settings on your camera to get the best results. You'll need to adjust your aperture, shutter speed, ISO, and white balance depending on the type of lighting you're using. A good starting point is to set your aperture to f/8 or higher, shutter speed at 1/125 or faster, ISO at 100, and white balance at auto. By following these steps and experimenting with different lighting techniques, you can create beautiful product photos that will help you stand out from the competition.
Choosing The Right Equipment For Your Needs
When it comes to choosing the right equipment for product photography, there are a few key elements to consider.Cameras, lenses, flashes, tripods, and other tools are all important for capturing great product photos. Here, we'll discuss the best types of equipment to use in order to create the perfect shot.
Cameras
: When choosing a camera for product photography, it's important to consider resolution, size, and weight. Digital SLR cameras are usually the best choice for product photography due to their ability to capture high-resolution images and their ability to use a variety of lenses. Mirrorless cameras are also becoming increasingly popular as they offer similar features as DSLRs but in a more compact package.Lenses
: The lens you choose will depend on what type of shots you are looking to capture.Macro lenses are great for close-up shots, while wide-angle lenses can be used to capture the entire product. For most product photography, a standard zoom lens is the best choice as it can provide a variety of focal lengths.
Flashes
: A flash can be used to add light to a scene or create dramatic shadows. An external flash is usually the best option for product photography as it can be used both off-camera and on-camera. On-camera flashes are also available but they tend to be more limited in terms of power and features.Tripods
: Tripods can help to keep your camera steady and reduce camera shake when shooting.They are especially useful when shooting with long exposures or when using heavier lenses. Tripods can range from light and portable models to heavy-duty professional models depending on your budget and needs.
Lighting Equipment
: Lighting is one of the most important elements in product photography and can make or break a shot. Lighting equipment such as softboxes, reflectors, and diffusers can be used to soften and control the light in order to create the perfect shot. Choosing the right equipment for your needs is an important part of product photography. By taking into account factors such as resolution, size, weight, lenses, flashes, tripods, and lighting equipment, you can ensure that you have the right tools for the job.Tips For Taking Great Product Photos
Lighting is an important element of product photography, but it isn't the only factor that affects the quality of your images.Composition, framing, perspective, and other elements also come into play when taking great product photos. When composing a product shot, consider how you want to frame the product. Do you want to show the entire product, or just a part of it? Consider the angle of the shot as well – does the product look better from a straight-on angle, or a more creative perspective? When framing your shot, think about the background. What colors and textures best complement the product? A plain white background is often used for product photography, but other colors and textures can be used to create interesting effects.
The position of the product within the frame is important too. It's best to position the product in a way that draws attention to it, rather than having it in the middle of the frame with nothing else around it. Finally, consider the perspective of the shot. Do you want to take a close up of the product, or do you want to capture it in its entirety? Different perspectives can drastically change the look of a photo, so experiment with different angles and distances.


Leave Message