Are you looking to create stunning product photographs in a studio environment? If so, having a great studio lighting setup is key. This guide will teach you everything you need to know about studio lighting, from the basics of lighting to more advanced techniques. Whether you are just getting started or an experienced professional, you will find valuable information here about how to achieve the best results with your studio lighting setup. We’ll cover topics like the different types of lighting available, how to set up a studio space for optimal lighting, and how to adjust your studio lighting for different types of products.
We’ll also explore advanced techniques like light modifiers, gels, and filters to enhance your product photography. With this comprehensive guide, you’ll have all the tools and knowledge necessary to create stunning product images in your own studio.
Testing and Refining Your Setup
Testing and refining your studio lighting setup is an essential part of achieving the desired results in product photography. It can be a long and tedious process, but the effort you put into it will pay off in the end. When testing and refining your setup, it's important to take into account the type of product you are shooting, the environment, and the desired outcome.Taking time to experiment with different lighting techniques and angles can help you achieve the desired look for your images. You should also consider using a light meter or other tools to measure light levels, as this will help you achieve more accurate results. Additionally, it's important to make sure that all the equipment is functioning properly, as any technical issues can affect the outcome of your photos. Finally, if you're feeling overwhelmed by the task of setting up a studio lighting setup, don't hesitate to call in an expert for help.
A professional photographer or lighting technician can provide valuable advice and insights into how to set up and adjust your setup for best results.
White Balance
White balance is an important part of product photography and it is essential to get it right. White balance is the process of adjusting the colors of an image to make sure that whites appear white and colors are accurately represented. It is important because incorrect white balance can lead to images with a color cast, making them look unnatural or unflattering. There are several ways to set the correct white balance for product photography. One way is to use a color meter to measure the colors in the scene and adjust accordingly.Alternatively, a white balance card can be used to make sure the colors in the scene are accurately represented. Both of these methods are effective but require a bit of practice to get right. When setting white balance, it is important to remember that different lighting conditions require different settings. For example, if you are shooting indoors, you will need to adjust the white balance to compensate for the artificial light. Similarly, if you are shooting outdoors, you will need to adjust the white balance for natural daylight. Finally, it is important to remember that white balance is not an exact science and sometimes you may need to tweak it slightly to get the desired result.
With a bit of practice and experimentation, you should be able to achieve good results with your studio lighting setup.
Light Meters and Color Meters
Light Meters and Color MetersWhen it comes to setting up a studio lighting setup, light meters and color meters are essential tools for capturing stunning product images. Light meters measure the amount of illumination in an area, and color meters measure the color temperature of light. Using a light meter is an important part of setting up the studio lighting setup. It will help you set the intensity of the light so that your product photography will be perfect.You can adjust the light according to the readings on the meter. To use a light meter, you need to place it in the area where you want to measure the light and then read the results. Color meters are also very useful for setting up a studio lighting setup. They measure the color temperature of the light in an area, which can help you choose the right lighting for your product photography project.
To use a color meter, you need to place it in the area where you want to measure the light and then read the results. It is important to take accurate readings with both light and color meters when setting up a studio lighting setup. The readings should be taken multiple times and then averaged out to get an accurate reading. This will ensure that your product photography will look amazing.
Having a proper studio lighting setup is essential for capturing stunning product images. Knowing how to set up a studio lighting setup with light and color meters can take your product photography to the next level.
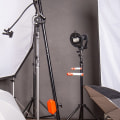
Light Positioning and Angling
Positioning and angling studio lights is an important part of setting up a lighting setup for product photography. It is essential to understand the basics of light positioning and angling in order to create the desired effect. The most important thing to consider when positioning and angling your lights is the direction of the light.You should always keep in mind that the light should be coming from a single direction and should be angled so that it casts shadows where you want them. It is also important to keep in mind that different lights will produce different effects. For example, a hard light will create a sharp, contrasty look while a soft light will create a more diffused look. In addition to direction, you should also consider the angle of the light.
A low angle will create dramatic shadows and highlights, while a high angle will create softer shadows and highlights. When creating shadows, highlights, and color temperature effects, you can use flags or other light modifiers to control the light. Flags are pieces of material that are placed between the subject and the light source and can be used to block or shape light. This can be used to create interesting lighting effects such as backlighting or rim lighting. Using flags or other light modifiers also allows you to control the color temperature of the light.
By using gels or other filters, you can adjust the color temperature of the light to create a warmer or cooler look.
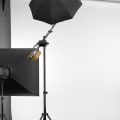
Types of Lights
When it comes to studio lighting setup, there are several types of lights available for use. Each type has different advantages and disadvantages that should be taken into consideration when choosing the right one for your project. The main types of lights used in studio lighting setup are fluorescent lights, tungsten lights, LED lights, and strobe lights. Fluorescent Lights – Fluorescent lights provide a soft and diffused light that is perfect for product photography. They are relatively affordable and do not produce too much heat, making them ideal for long shooting sessions.However, they require a separate ballast to regulate the current and may require additional equipment to adjust the light’s color temperature. Tungsten Lights – Tungsten lights are very bright and produce an intense light that can easily be adjusted. They are ideal for shooting in low-light conditions, but they can also cause glare if not used properly. They also generate a lot of heat, which can be an issue when shooting for long periods. Product Photography LED Lights – LED lights are very energy efficient and produce less heat than other types of lights. They are also highly adjustable, making them ideal for fine-tuning the lighting in your studio.
The downside is that they can be expensive and require additional equipment to adjust the color temperature.
Strobe Lights
– Strobe lights offer a very powerful, focused light that can be used to create dramatic effects in product photography. The downside is that they can be expensive and require additional equipment to adjust the power output. They also require a higher degree of skill to use correctly. When choosing the right type of light for your studio lighting setup, it's important to take into consideration the advantages and disadvantages of each type. Fluorescent lights are great for providing a soft, diffused light and are relatively affordable, while tungsten lights offer an intense light that can easily be adjusted.LED lights are energy efficient and require less equipment to adjust the color temperature, while strobe lights provide a powerful light that creates dramatic effects. Depending on your particular needs, one type may be better suited than another.
Studio Lighting Setups
Studio Lighting Setup is essential for capturing stunning product images. There are several types of lighting setups, each offering different benefits depending on the type of photography you are doing. Let's take a look at the three most common types of studio lighting setups: three-point lighting, four-point lighting, and using natural light.Three-Point Lighting is one of the most popular types of studio lighting setups and is often used for portrait photography. It consists of three lights: a key light, a fill light, and a back light. The key light is the main source of illumination and should be placed to one side of the subject, usually at a 30-degree angle. The fill light should be placed on the opposite side of the key light and is used to reduce shadows and fill in any areas that are too dark.
The back light is placed behind the subject and adds depth and dimension to the photo.
Four-Point Lighting
is a more complex type of studio lighting setup and is often used for commercial photography. It consists of four lights: a key light, a fill light, a back light, and a rim light. The key light is still the main source of illumination and should be placed to one side of the subject, usually at a 30-degree angle.Finally, the rim light is placed at an angle to create a halo around the subject.
Natural Light
is an alternative to studio lighting setups and can be used to create beautiful images. Natural light can come from windows or skylights, or can be reflected off walls or other surfaces. Natural light can be used to create dramatic shadows or soft, gentle lighting effects depending on the time of day and how you set up your camera.No matter which type of studio lighting setup you choose, it's important to remember that practice makes perfect. Experiment with different setups until you find one that works for you. With patience and practice, you'll be able to create stunning product images with your studio lighting setup.
Leave Message